


As a seasoned supplier of brass bibcocks, I understand the importance of ensuring these fixtures function smoothly. Brass bibcocks are widely used in various settings, from residential bathrooms to commercial buildings, due to their durability and corrosion resistance. However, like any plumbing fixture, they can encounter issues over time. In this blog, I'll share some practical tips on how to troubleshoot common problems with brass bibcocks.
1. Leaking Bibcock
One of the most common issues with brass bibcocks is leakage. A leaking bibcock not only wastes water but can also cause damage to the surrounding area if left unattended. Here are the steps to troubleshoot a leaking bibcock:
- Check the Valve Seat: The valve seat is the part of the bibcock where the valve washer sits. Over time, the valve seat can become worn or damaged, causing water to leak around the valve. To check the valve seat, turn off the water supply to the bibcock and remove the handle and packing nut. Use a flashlight to inspect the valve seat for any signs of wear or damage. If the valve seat is damaged, it may need to be replaced. You can purchase a replacement valve seat from a plumbing supply store.
- Inspect the Valve Washer: The valve washer is a small rubber or neoprene disc that seals the valve when it is closed. If the valve washer is worn or damaged, it can cause water to leak around the valve. To inspect the valve washer, remove the valve stem from the bibcock. The valve washer is usually located at the end of the valve stem. Check the valve washer for any signs of wear, such as cracks or tears. If the valve washer is damaged, replace it with a new one. Make sure to choose a valve washer that is the correct size and material for your bibcock.
- Tighten the Packing Nut: The packing nut is located just below the handle of the bibcock. It is used to hold the valve stem in place and prevent water from leaking around the stem. If the packing nut is loose, it can cause water to leak from the base of the handle. To tighten the packing nut, use a pair of pliers or a wrench to turn the nut clockwise. Be careful not to over-tighten the packing nut, as this can damage the valve stem or the packing material.
2. Dripping Bibcock
A dripping bibcock can be annoying and waste a significant amount of water over time. Here's how to troubleshoot a dripping bibcock:
- Clean the Valve Seat: Sometimes, a dripping bibcock can be caused by dirt or debris that has accumulated on the valve seat. To clean the valve seat, turn off the water supply to the bibcock and remove the handle and packing nut. Use a soft brush or a cloth to clean the valve seat. Make sure to remove any dirt, debris, or mineral deposits that may be present. Once the valve seat is clean, reassemble the bibcock and turn on the water supply.
- Replace the O-Ring: The O-ring is a small rubber ring that seals the connection between the valve stem and the body of the bibcock. If the O-ring is worn or damaged, it can cause water to drip from the base of the handle. To replace the O-ring, turn off the water supply to the bibcock and remove the handle and packing nut. Use a pair of pliers or a small screwdriver to remove the old O-ring. Replace the old O-ring with a new one that is the correct size and material for your bibcock. Reassemble the bibcock and turn on the water supply.
3. Difficult to Turn the Handle
If you're having trouble turning the handle of your brass bibcock, it could be due to a few different reasons:
- Lubricate the Valve Stem: Over time, the valve stem can become dry and sticky, making it difficult to turn the handle. To lubricate the valve stem, turn off the water supply to the bibcock and remove the handle and packing nut. Apply a small amount of plumber's grease or silicone lubricant to the valve stem. Reassemble the bibcock and turn on the water supply. The lubricant should make it easier to turn the handle.
- Check for Obstructions: Sometimes, an obstruction in the valve can prevent the handle from turning smoothly. To check for obstructions, turn off the water supply to the bibcock and remove the handle and packing nut. Use a flashlight to inspect the valve for any signs of debris or obstructions. If you find an obstruction, use a small brush or a toothpick to remove it. Reassemble the bibcock and turn on the water supply.
4. Low Water Pressure
If you're experiencing low water pressure from your brass bibcock, here are some possible causes and solutions:
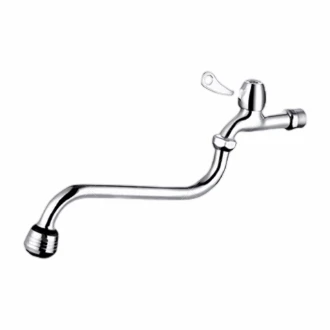

- Check the Water Supply: Make sure that the water supply to the bibcock is fully open. Sometimes, the main water valve or a shut-off valve may be partially closed, causing low water pressure. Check all the valves in the water supply line to ensure that they are fully open.
- Clean the Aerator: The aerator is a small device located at the end of the spout of the bibcock. It is used to mix air with the water and reduce splashing. Over time, the aerator can become clogged with dirt, debris, or mineral deposits, causing low water pressure. To clean the aerator, remove it from the spout of the bibcock. Soak the aerator in a solution of vinegar and water for a few hours. Use a small brush to clean the aerator and remove any dirt or debris. Rinse the aerator thoroughly and reinstall it on the spout of the bibcock.
- Check for Pipe Blockages: A blockage in the water supply pipe can also cause low water pressure. If you suspect that there is a blockage in the pipe, you may need to call a professional plumber to diagnose and fix the problem.
5. No Water Flow
If there is no water flowing from your brass bibcock, here are some steps to troubleshoot the problem:
- Check the Water Supply: Make sure that the water supply to the bibcock is turned on. Check all the valves in the water supply line to ensure that they are fully open. If the water supply is turned on and there is still no water flow, there may be a problem with the bibcock or the water supply pipe.
- Inspect the Bibcock: Remove the handle and packing nut from the bibcock. Use a flashlight to inspect the valve for any signs of damage or blockage. If the valve is damaged, it may need to be replaced. If there is a blockage in the valve, use a small brush or a toothpick to remove it.
- Check the Water Supply Pipe: If the bibcock appears to be in good condition, there may be a blockage in the water supply pipe. You may need to call a professional plumber to diagnose and fix the problem.
Conclusion
Troubleshooting a brass bibcock can be a relatively simple process if you know what to look for. By following the steps outlined in this blog, you should be able to identify and fix most common problems with brass bibcocks. However, if you're unsure about how to troubleshoot a particular problem or if you're not comfortable working with plumbing fixtures, it's always best to call a professional plumber.
As a brass bibcock supplier, we offer a wide range of high-quality brass bibcocks, including Shower Bibcock, with Lock Water Bibcock, and Zinc Alloy Bibcock. If you're in the market for a new brass bibcock or if you have any questions about our products, please don't hesitate to contact us. We're here to help you find the right solution for your plumbing needs.
References
- "Plumbing for Dummies" by Richard Trethewey and Carter Oosterhouse
- "The Complete Guide to Plumbing" by Black & Decker


